Assigning students to breakout rooms
 Before starting breakouts, determine how many breakouts to have and how you are going to assign students to the breakout rooms.
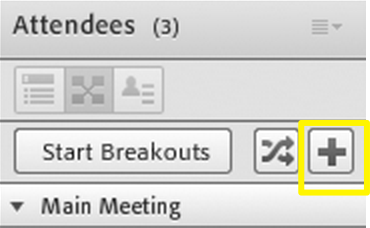
The Attendees pod has three breakout rooms by default. Add more by clicking the “+” sign in to the right of “Start Breakouts”. The maximum is 20.
There are two ways to do assign students to breakout rooms: manually or automatically.
- Do this automatically by clicking the “Evenly Distribute” button
 that is to the right of “Start Breakouts”.
 - For manual assignment, select an attendee name in the list (use control-click or shift-click to select multiple attendees). Then either drag attendees to a breakout room or select a breakout room from the flyout.
Once you’ve made the assignments, click “Start Breakouts” to begin.
Running the breakouts
In the breakouts, attendees all have the role of presenter. They can share their voice, share content in the Share pod, modify whiteboards, and add text to the Notes pod.
Note: if you are recording the meeting, the recording will capture only the main room (which is now empty). If students are only using chat, you can see the chat sessions from the main layout by opening each chat pod. However, if you enter a breakout room (drag your name to the breakout room in the Attendee List pod) you’ll lose that view of all the chats.

Best practices
Things to think about before setting up breakout sessions.
- If no one has previously run an Adobe Connect meeting, they may feel lost.
- The breakout room will adopt the template you are using when you “Start Breakouts”. (I think. I hope.) Build one with the elements that students might need.
- Consider coaching one member of each team in advance, if only to give them a high-level overview of the Connect interface options available to presenters.